MIDI Input Device Settings
This feature is available in Musink Pro only.
Musink Pro lets you use a MIDI device, such as a keyboard or drum kit, to directly enter notes into your project. This page contains details on how to connect to a MIDI device and calibrate it.
What You Will Need
To use this functionality you will need a copy of Musink Pro and either
- Software that emulates a MIDI device
OR
- A MIDI device, such as a keyboard
- Means to connect your MIDI device to your computer, such as a MIDI-to-USB cable
Your soundcard must also support MIDI. To test if this is the case, try to play a note in Musink, or open any MIDI file on your computer. If this succeeds, your soundcard supports MIDI.
Connecting Your Device
If your device came with drivers or other installation software, you should install those drivers or software before continuing.
USB-Plug Devices
Plug in your USB device directly into a USB port on your computer.
MIDI-Plug Devices
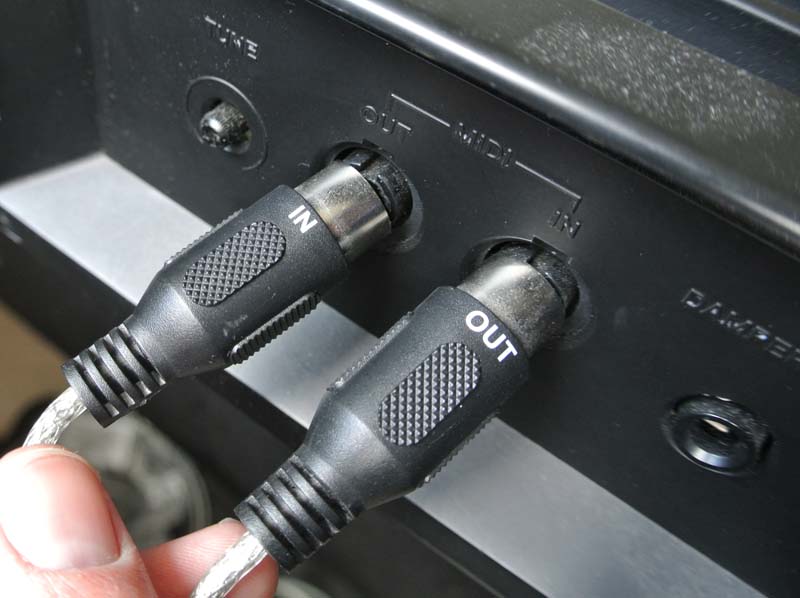
Insert MIDI plugs into your MIDI device so that
- The Out plug goes to the In port on your keyboard, and
- The In plug goes to the Out port on your keyboard

Connecting To Device In Musink Pro
From Settings You Have Saved Before
1. Turn your device on
2. Run Musink Pro, and start a new project
3. From the menu bar, select Tools, then select MIDI Input Settings…. A window will open.
4. Press Open. A window will open.
5. Choose the setup that you saved earlier, then press OK. The window will close.

6. Press Finish.
If you cannot press finish, this is because the settings you saved were for a device that Musink can't find. Check that your device is connected and on, then press Refresh.
For A New Device
To connect to your device in Musink Pro:
1. Turn your device on
2. Run Musink Pro, and start a new project
3. From the menu bar, select Tools, then select MIDI Input Settings…. A window will open.
4. Select your MIDI device from the drop down menu. If your device is not listed, see Troubleshooting Input Devices.
5. Press Next to calibrate your device (see instructions below), or Finish if you do not wish to calibrate it
Preparing MIDI Drum Kits
If you are not using a MIDI drum kit, you can skip this step.
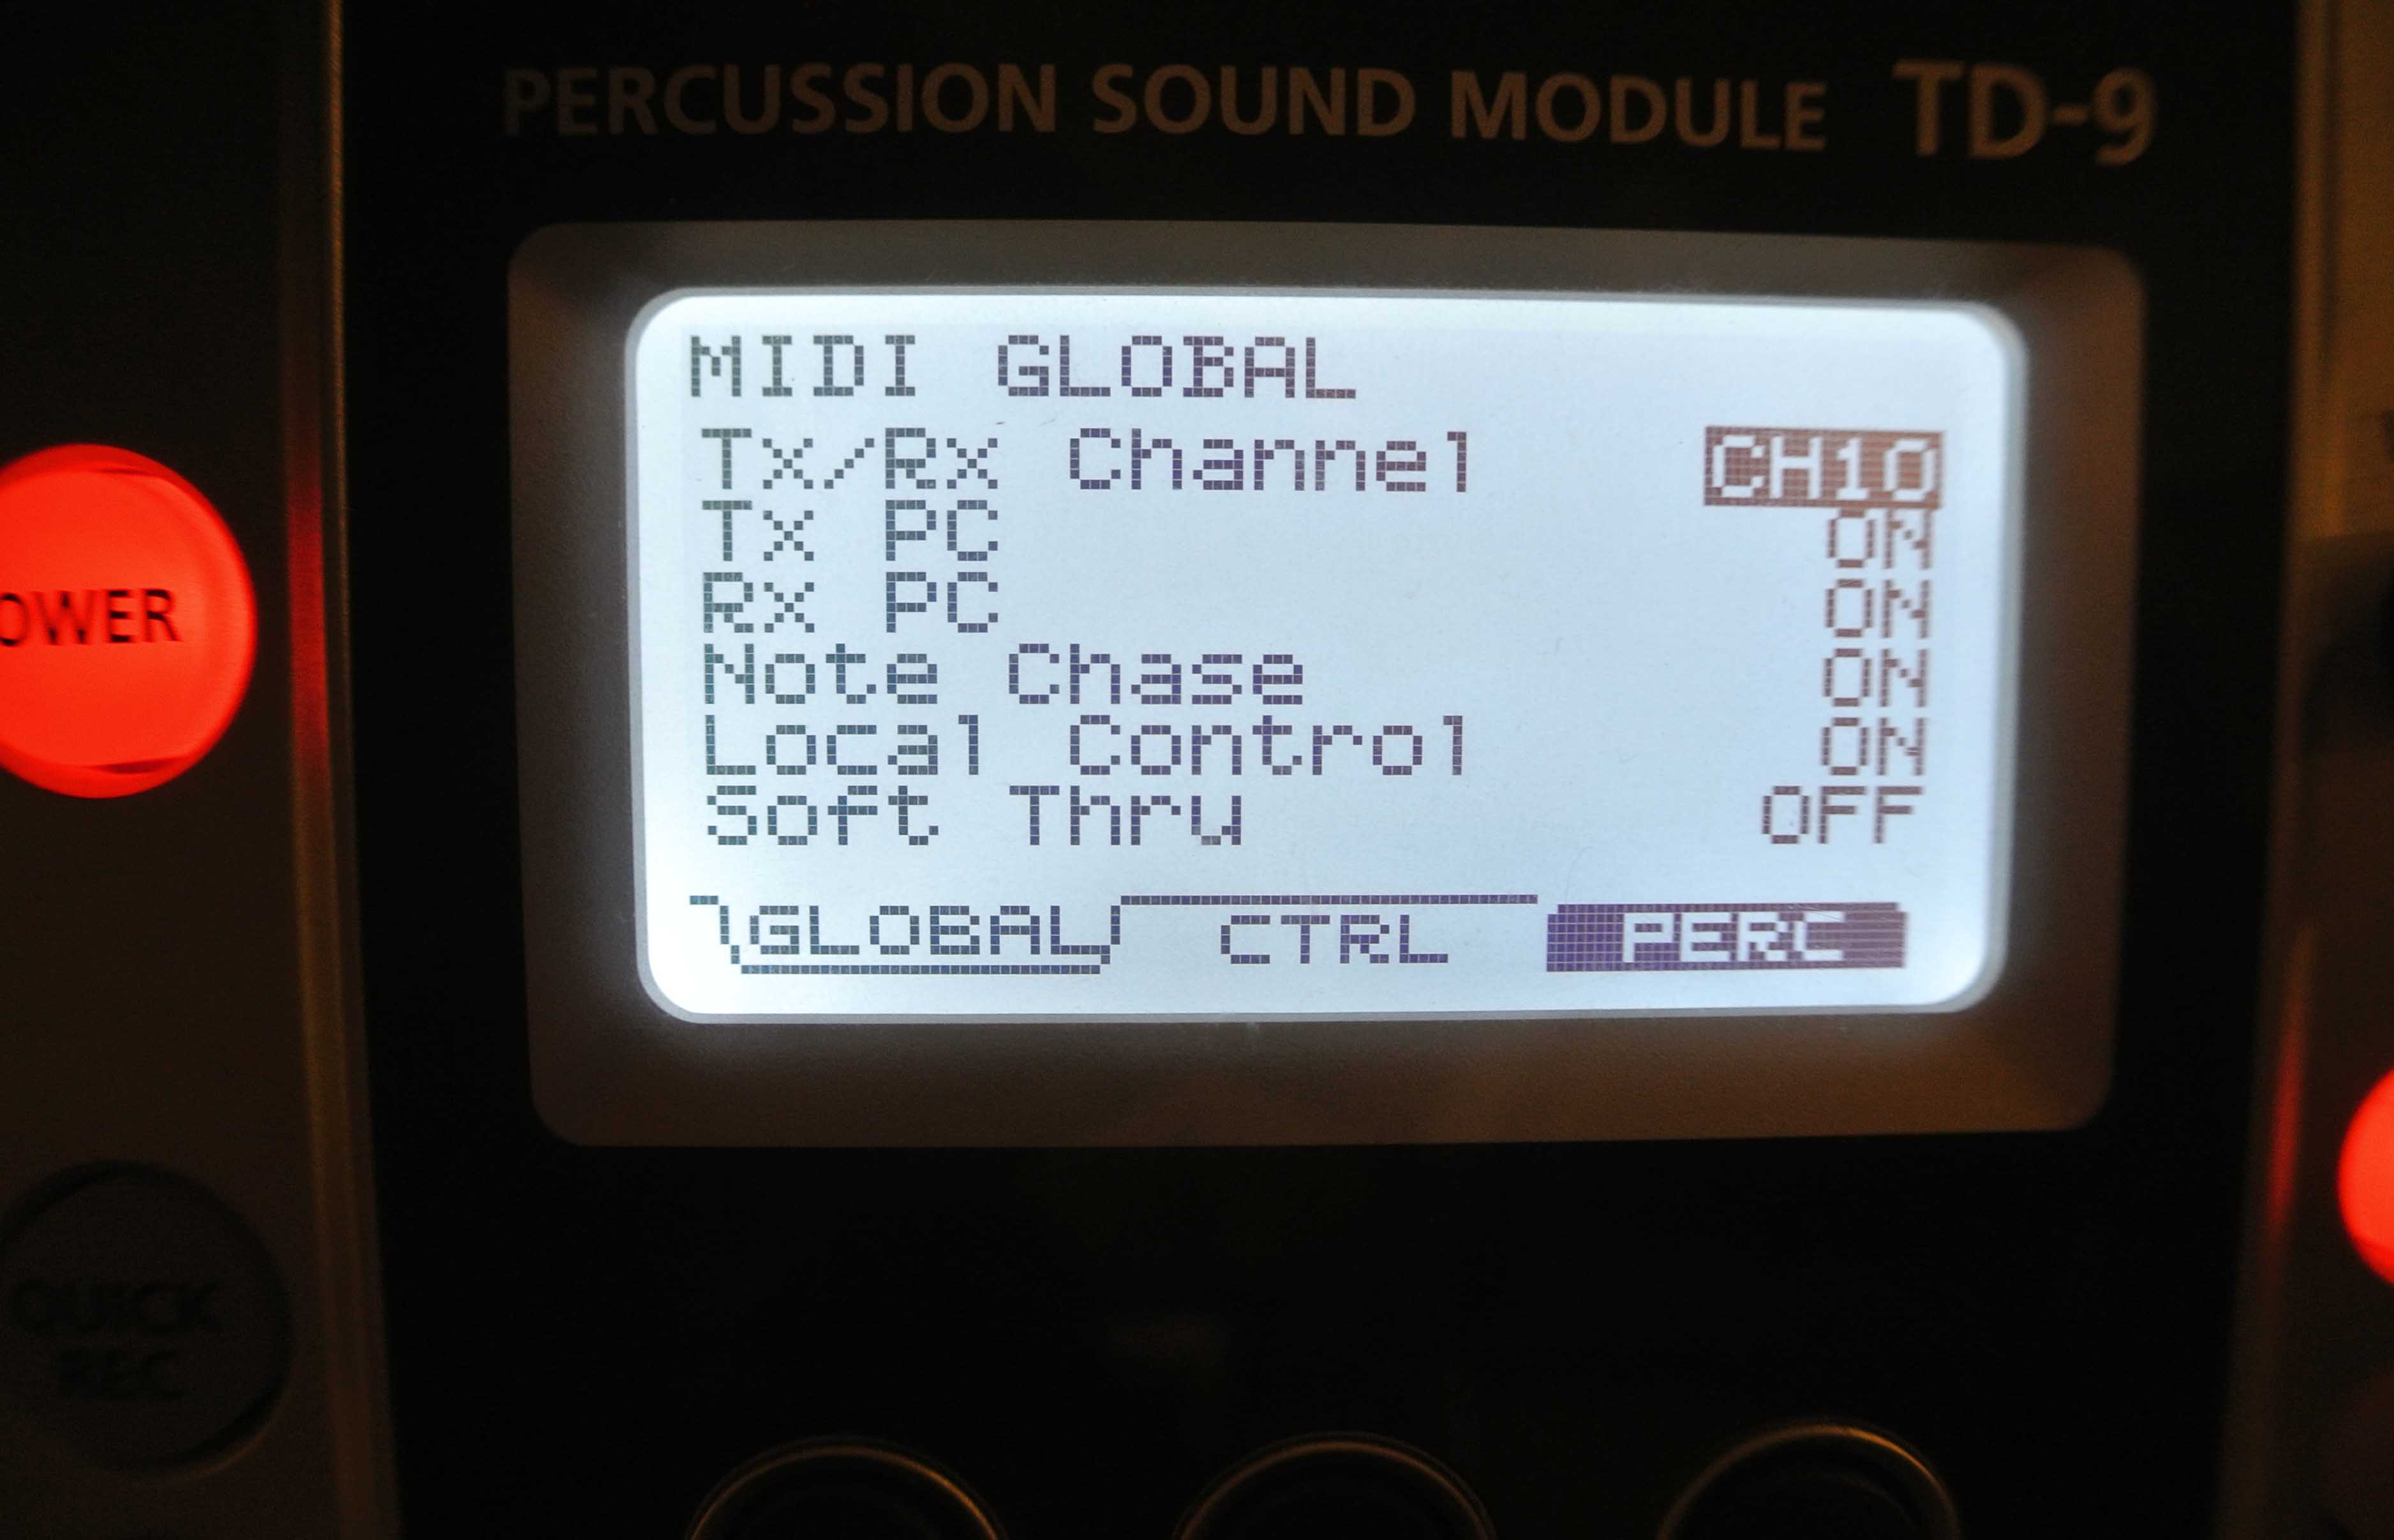
Some MIDI drum kits require changing of settings in order to be compatible with Musink. If possible:
- Ensure that your kit is sending signals out through channel 10
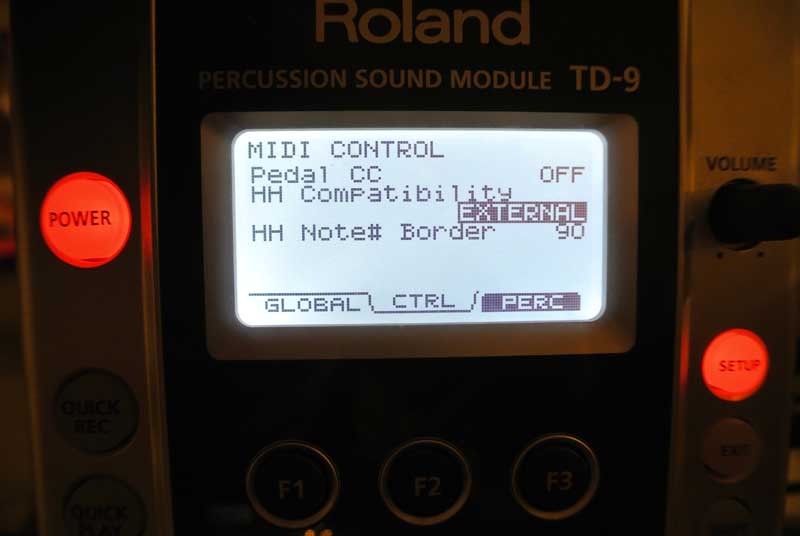
- Set your Hihat pedal to send Note-On messages, rather than CC Messages
Calibrating your MIDI Device
Not all MIDI devices, soundcards, and USB-MIDI devices are behave the same way. Calibrating your setup ensures Musink gets your timing and notes correct. This may take a few minutes, but you can save your calibration so you can quickly load it later.
Pitch
If you are recording from a drum kit, or are inputting percussion, you can skip this step.
1. If the MIDI Calibrate Window is not open, open it and connect to your device (see instructions, above), then press Next
2. Press Middle-C on your keyboard. Musink should state that it received a message from your MIDI device. If it does not, see Troubleshooting Input Devices.
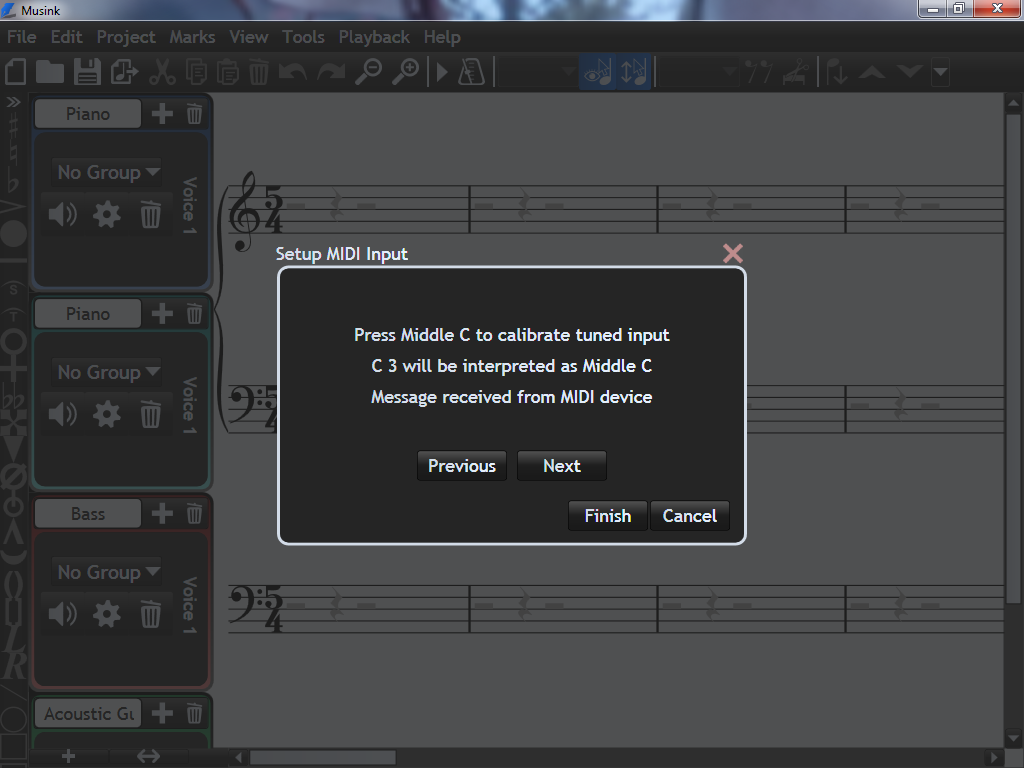
3. Press Next
Tip To automatically transpose what you play, set middle-c to a note that is not c. Setting it to C-sharp, for example, will mean everything all you play is automatically transposed down one semitone.
Percussion
If you are not inputting percussion, you can skip this step.
Calibrating percussion connects MIDI pitches to certain drums. On a keyboard, this lets you set which key refers to which drum note. On a drum kit, this ensures that Musink knows which of your drums are which. You can set more than one pitch to each drum, which is important for drum kits with multi-zone cymbals. Make a mental list of each drum/percussion-instrument you wish to play (e.g. snare drum, bass drum, ride cymbal). For each of these:
1. Press the Set button. A Strike Drum message will appear
2. Strike the appropriate drum or key
3. Musink will set the pitch for that drum. If it does not, see Troubleshooting Input Devices.
4. If you wish to add more than one pitch for this drum, Press the + button and repeat the steps above
When you have completed this for all drums, Press Next.
Info Many drum kits have cymbals with bow, edge and bell areas. Each of these areas sends a different pitch. If you have a drum kit like this, you should add a pitch for each zone of your cymbals. That way, all zones of your cymbal are interpreted as the same cymbal. Strike the edge of your cymbal for one pitch, and strike the top of your cymbal for the next pitch. If you want you cymbal bell zones to be interpreted as bell, set them to Ride Bell, rather than to ride or crash cymbals.
Info If a pitch is not set to a drum and you strike it during recording, Musink will interpret it as a snare drum hit.
Delay Compensation
If you do not wish to record live, or know you have a low-latency setup, you can skip this step.
Some soundcard drivers put a large delay on MIDI input data. The result is that keys you strike do not sound for a fraction of a second. This is a soundcard issue, not a Musink bug nor a compatibility issue. There is some discussion about this at Troubleshooting Input Devices.
Musink Pro has a delay compensation mechanism that takes into account the delay caused by your soundcard. This does not fix any delays that you hear, but rather lets Musink compensate for delays during live recording, so that your notes are not out of time.
To set delay compensation:
1. If the MIDI Input Window is not open, open it, connect to a device (see above) and move to the last page by pressing Next
2. Press the Start Button. A metronome will play at around 60 bpm.
3. On your MIDI device, tap a key or drum in time with the metronome as accurately as you can for at least four beats. The delay caused by your soundcard will show in the box.
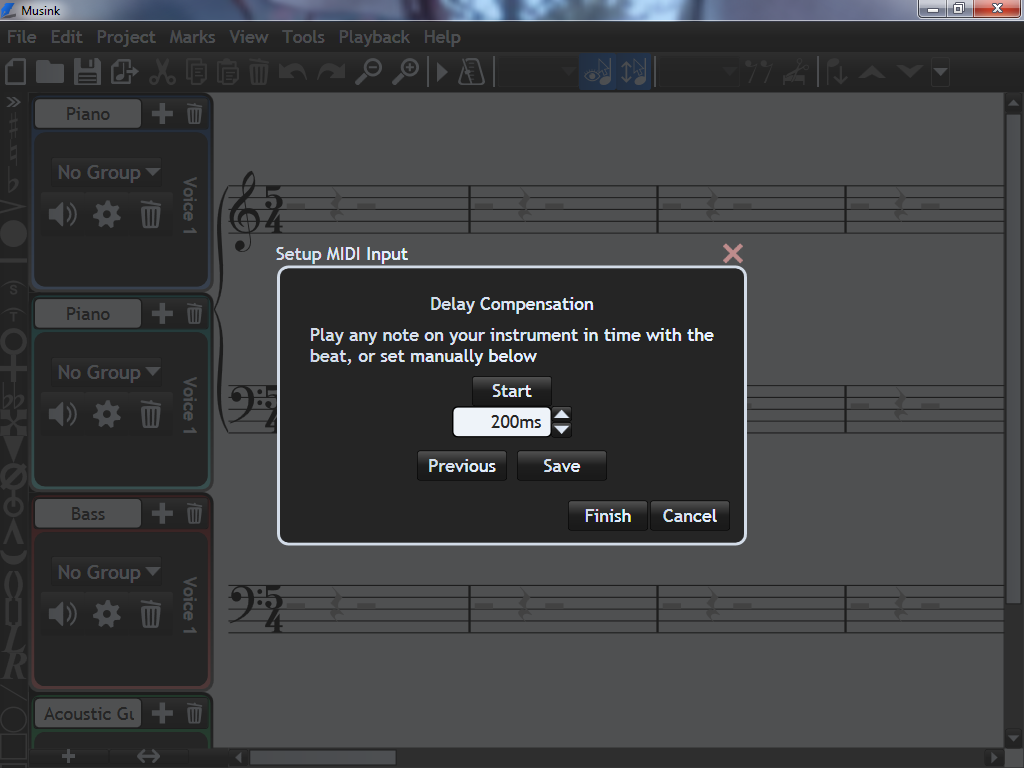
4. Press Stop when you are done
Tip If you have a noticeable delay, and a keyboard with a speaker, use the speaker on your keyboard as this will not be delayed. To avoid hearing the delayed sound from your computer, uncheck the Pass MIDI data thru to output device check-box. This check-box was on the first window (when you select your MIDI device). You can return to this window by clicking the Previous button (you will not lose your settings).
Info If your delay is over a second, you will have to enter an estimate for it and manually write it in the box provided.
Saving Settings
You should save your settings so that you only have to set them once. To save your settings:
1. If the MIDI Input Window is not open, open it, connect to a device (see above) and move to the last page by pressing Next
2. Press Save
3. Write a new file name in the window that appears, or select an existing file to overwrite
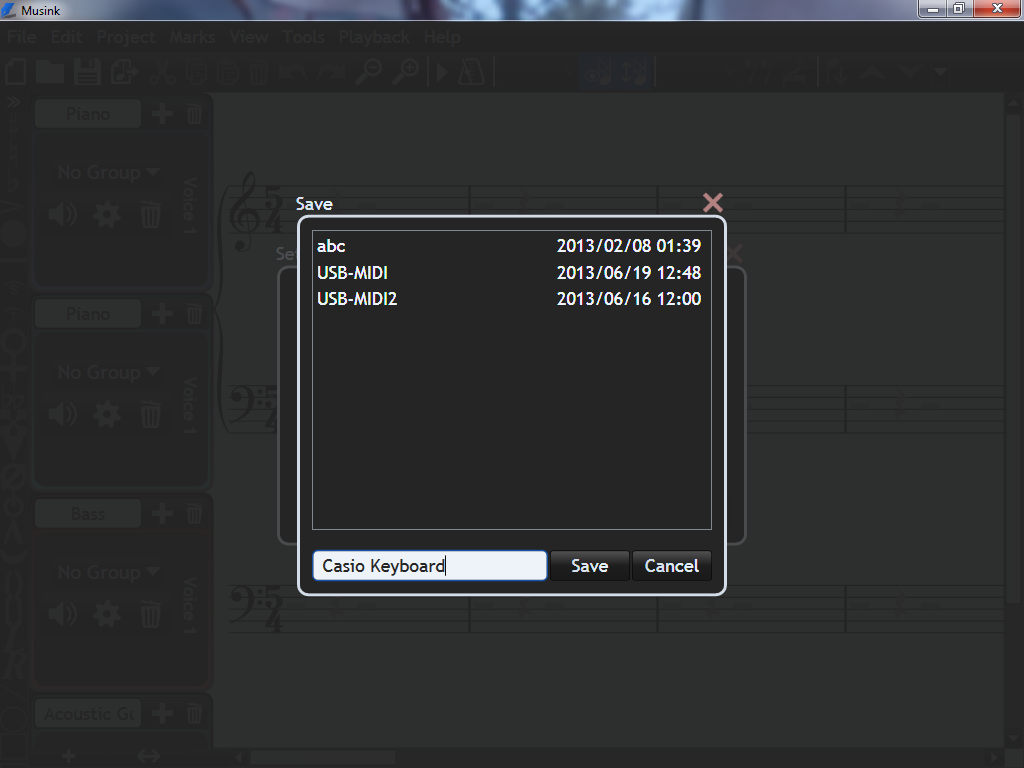
4. Press Save. The window will close.
5. Press Finish to close the window and begin using your MIDI device.
Tip You can delete saved settings from this window by clicking on them and pressing the delete key