Publishing
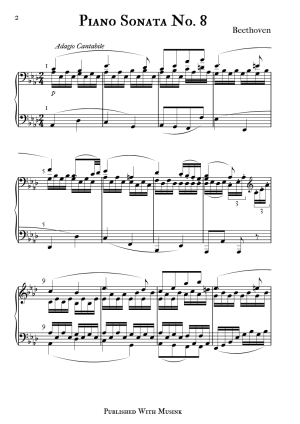
Publishing is the process of converting your project into a PDF document, XPS document, or PNG (image) files. It can be thought of as a special kind of export operation that arranges your music into rows and pages. Publishing is completely automated. How your project appears depends on the page template that you select, and any publish settings you choose. A project can be published any number of times, and can be edited after publishing. Publishing does not affect how your music appears in the Music Editing Area.
Advantages of Publishing
By automating publishing, Musink allows you to:
- Focus on writing music, rather than waste your time formatting it
- Export your music to two or more different formats in a matter of seconds. For example, you can publish to a format suitable for printing, and then quickly publish again in a format suitable for reading on an eBook or iPad
- Make small tweaks to your music without having to reformat everything that follows
What is Automated?
During publishing, Musink automatically:
- Merges voices with the same Voice Group
- Overlays voices from the same stave on top of each other
- Arranges the position of marks and text to prevent overlapping
- Arranges your music onto rows and pages
- Sets the size and margins of the page, based on the template of choice
- Sets page titles, page numbers, and their fonts, based on the template of choice
- 'Stretches' your bars to fit the width of the page (optional)
- Labels your staves with their stave names (optional)
- Simplifies note groupings (optional)
- And many others…
Publishing only affects how your project appears in published form. You will not see any changes to your project in the Music Editing Area.
How To Publish
To publish your work:
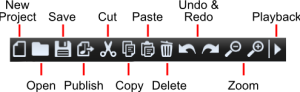
1. Press the publish button, or select File –> Publish from the menu bar. The publish window will appear:

2. Choose a template (optional)
3. Change any publish options you wish to change (optional)
4. Press Publish
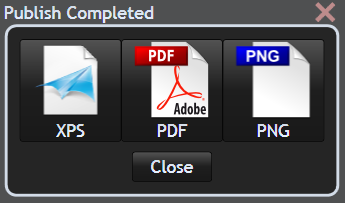
5. When publishing has completed, choose the format you wish to save your work as (XPS, PDF or PNGs)
6. A pop-up window will appear to save the file. Save it where you wish.
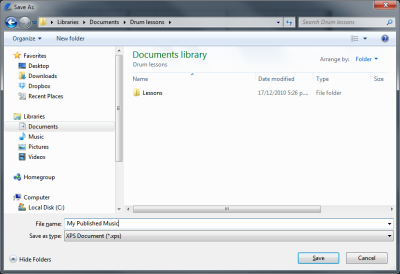
7. You will be notified that it has saved. Click Open File to open it (optional)
8. Press OK to close the popup window
9. Close the Publish Completed popup, or save your work again in a different format
Printing
To print your work:
- Publish your project to an XPS or PDF document
- Save the XPS/PDF document to file
- Open the XPS/PDF document by double clicking it in Windows Explorer, or by clicking Open File from the saved notification popup
- Choose “Print” from the File Menu of the software that opened the file